As square footage in modern homes and apartments becomes an increasingly precious commodity, the way we conceptualize interior architecture has had to evolve. Gone are the days when every functional zone required its own dedicated room. Today, the smartest interiors rely on architectural hybridization—fusing distinct zones into seamless, multi-purpose micro-environments.
At the forefront of this design revolution is the space-saving floating desk and reading nook combo.
This brilliant layout marries productivity with peace, merging the rigorous focus of a home office with the restorative escapism of a personal library. Whether you are living in a compact urban studio or looking to optimize an awkward bedroom corner, this comprehensive guide will walk you through everything you need to know to design, build, and style this ultimate dual-purpose sanctuary.
1. Deconstructing the Concept: Why This Combo Works
To understand the genius of pairing a floating desk with a reading nook, you have to look at modern psychological triggers within interior design. Our brains crave environmental cues to switch between “work mode” and “relax mode.” Traditionally, this required physical separation—walking into a home office versus sitting on a living room sofa.
However, when space is tight, combining these zones into an L-shaped or linear wall configuration actually enhances psychological zoning if executed correctly:
Zero Floor Footprint: By utilizing a wall-mounted floating desk, the floor remains entirely unobstructed. This tricks the eye into perceiving the room as larger and more open.
The Yin and Yang of Room Energy: Productivity requires an outward, focused energy (facing a wall, managing tasks, handling glowing screens), while a reading nook demands an inward, relaxed posture (curling up, tactile page-turning, soft textiles). Placing them adjacent creates a harmonious flow without letting work bleed into rest.
Vertical Real Estate Maximization: Instead of spreading outward into precious walking paths, a combo unit uses vertical walls for floating shelving, book storage, and integrated lighting.

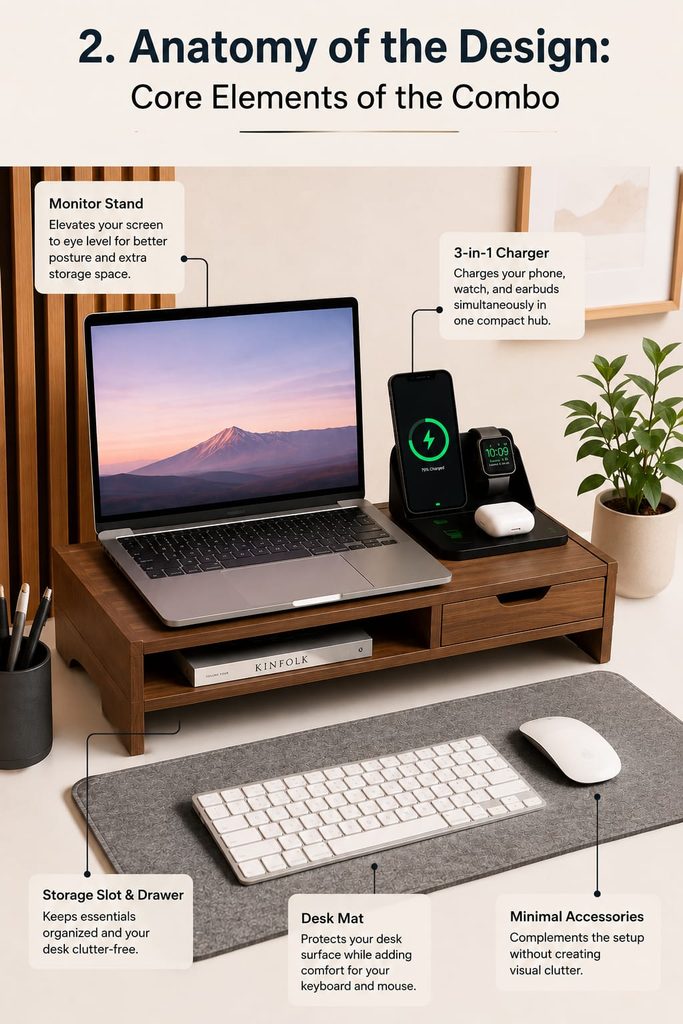
2. Anatomy of the Design: Core Elements of the Combo
Building an elite floating desk and reading nook combo requires careful planning of scale, materials, and ergonomics. Let’s break down the individual components that make up the system.
A. The Floating Desk Anchor
The workstation component must be streamlined to maintain the illusion of space.
Dimensions: Aim for a depth of 16 to 20 inches—just enough for a laptop, a notebook, and a sleek task lamp. Length can range from 32 inches for a tight corner to 48 inches for a standard single-person station.
Mounting Mechanics: Heavy-duty steel brackets hidden beneath or routed directly into the wood slab are essential. Since this desk shares wall space with a relaxing lounge area, structural safety and clean lines are paramount.
Cable Management: A messy cord nest ruins the minimalist aesthetic. Incorporate a built-in grommet hole or an under-desk wire raceway to keep power cords hidden from view.
B. The Transition Zone and Book Storage
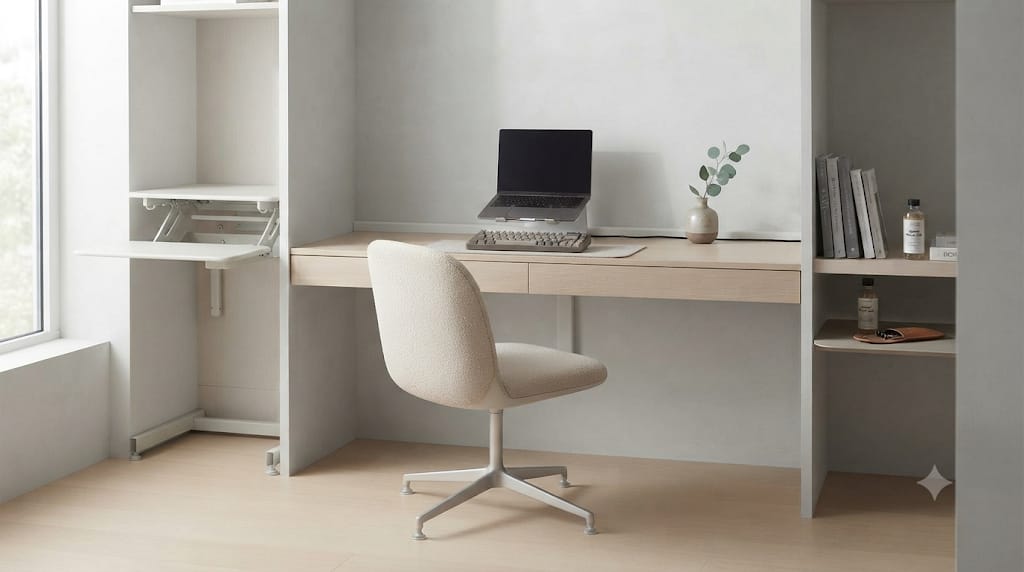
The bridge between your workspace and your reading chair is usually a shared vertical bookshelf or a continuous wrap-around floating ledge.
Vertical Integration: Install floor-to-ceiling or desk-to-ceiling vertical bookshelves right beside the reading nook, letting the lower shelves double as a side table for your coffee cup while sitting in the reading chair.
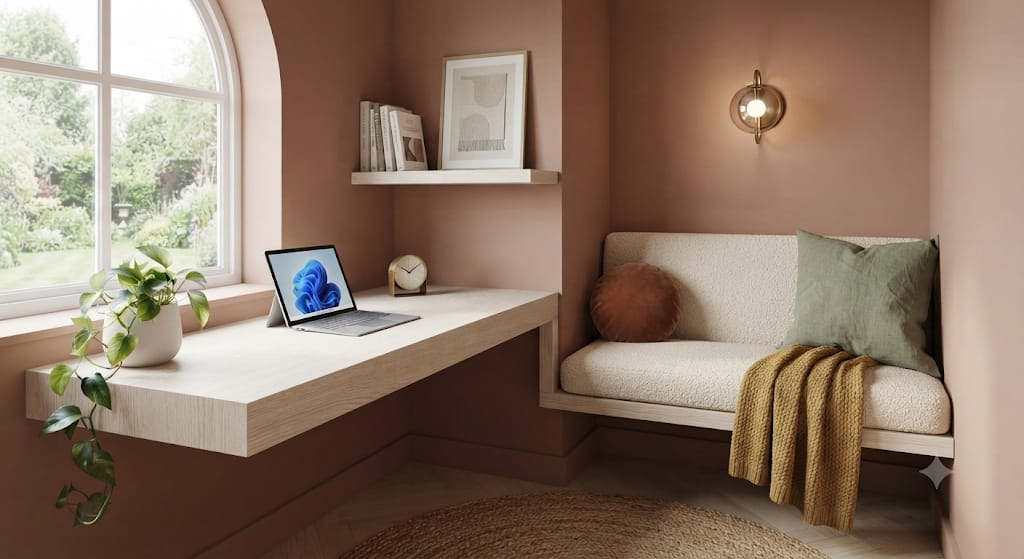
The Corner Connection: If your room layout allows for an L-shaped corner configuration, the floating desk can literally wrap around into a built-in bench seat or a low-profile daybed element.
C. The Cozy Reading Nook Foundation
A reading nook lives and dies by its comfort factor. Even in a small space, you can create an ultra-inviting micro-retreat.
Seating Options: If floor space is extremely tight, a wall-mounted upholstered cushion creates a window-seat effect. Alternatively, a slim-profile accent chair (like a Scandinavian-style slipper chair or a lightweight rattan Papasan) that can be easily tucked or angled toward the desk is ideal.
Textile Layering: Use heavy textures—bouclé, chunky knit wool throws, velvet lumbar pillows, and a plush sheepskin rug—to visually separate the “soft” reading zone from the “hard, clean” lines of the wooden desk.
3. Step-by-Step Design Blueprint: From Concept to Execution
If you are planning to bring this combo to life in your home, follow this phased execution plan to ensure structural integrity and aesthetic perfection.
Lighting Layering]
Phase 1: Spatial Mapping and Wall Assessment
Locate a dead corner or an underutilized blank wall (ideally near natural light from a window). Use a stud finder to map out your wall framing. Because floating desks bear downward pressure (especially when leaning on them), securing your brackets directly into wall studs is non-negotiable.
Phase 2: Ergonomic Planning
Desk Height: Standard desk height is 30 inches from the floor, but adjust this based on your height and chair choice.
Nook Proportions: Ensure your reading chair or bench allows for relaxed leg posture. If pairing with a low reading chair, ensure the transition height from desk to nook feels natural, or separate them visually with a vertical slat wall divider or paint color-blocking.
Phase 3: Material and Palette Selection
To keep a small room feeling cohesive, limit your material palette to three core elements:
Primary Wood Tone: White oak, walnut, or birch for the floating desk and shelves.
Anchor Accent Color: Deep forest green, moody charcoal, or warm terracotta painted in an L-shaped block behind both the desk and the nook to tie them together as one unified architectural installation.
Hardware Finish: Matte black, brushed brass, or architectural white to match your light fixtures and brackets.
Phase 4: Lighting Layering
Lighting is the secret sauce that transforms a basic piece of furniture into a high-end designer statement. Avoid harsh overhead lighting; instead, use a three-tier lighting strategy:
Task Light: A sleek, adjustable arm lamp for the floating desk.
Ambient Light: A dimrable wall sconce with a warm bulb positioned directly above the reading nook.
Accent Light: Warm LED strip lighting hidden underneath the floating desk and upper bookshelves to create a gorgeous floating glow effect at night.

4. Clever Variations for Different Room Layouts
Not every home has the same footprint. Here is how you can adapt the floating desk and reading nook combo to unique spatial constraints:
A: The Studio Apartment Corner Wrap
In an open-plan studio, utilize a corner. Mount an L-shaped floating desk on one wall, and let it transition seamlessly into a low daybed or custom window bench adorned with cushions on the adjoining wall. This creates a unified perimeter command center, leaving the center of the room open.
B: The Bedroom Micro-Office Alcove
If your bedroom doubles as your home office, tuck the combo along a single long wall. Place the floating desk on the left, and a plush reading chair with a floor-to-ceiling bookshelf on the right. Paint the entire wall a soothing, muted tone (like sage or dusty blue) to camouflage the workspace when you are trying to wind down for sleep.
C: The Under-the-Stairs Hideaway
The awkward triangular space beneath a staircase is prime real estate for this combo. Custom-cut a floating desk to fit the lower slant of the stairs, and build a cozy, recessed reading nest tucked into the deeper end complete with recessed lighting and built-in book cubbies.

5. Styling and Decorating Tips for High-End Aesthetic Appeal
Once the hardware is installed, styling brings the concept together. Avoid clutter, as small spaces quickly look messy.
Rule of Threes on Shelves: Style your floating shelves with a balanced mix of books (stacked both vertically and horizontally), a trailing houseplant (like a Pothos or Philodendron for organic movement), and a single meaningful ceramic object or framed art print.
Acoustic Softness: Hard surfaces bounce sound. Add a textural woven wall hanging or acoustic felt panels behind your reading nook to absorb sound, making the space feel quiet and secluded even in a busy household.
The Multi-Tasking Seat: If space is severely restricted, choose a stylish upholstered storage ottoman as your reading nook seat. It can double as extra storage for winter blankets or office supplies, and can even be pulled over to the desk in a pinch.

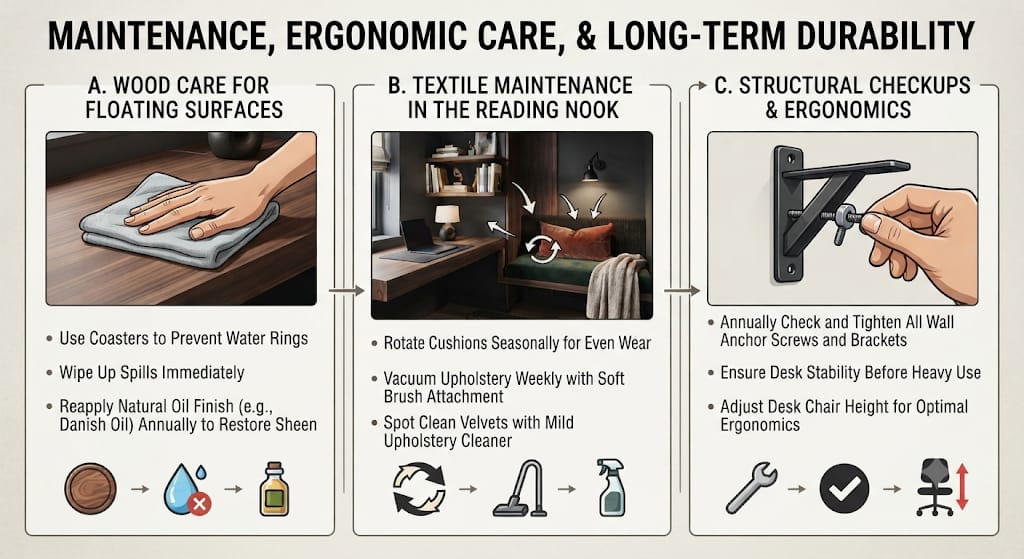
6. Maintenance, Ergonomic Care, and Long-Term Durability
Once your stunning floating desk and reading nook combo is installed and styled, maintaining its pristine appearance ensures it remains the centerpiece of your home for years to come.
A. Wood Care for Floating Surfaces
Avoid Moisture Damage: Solid wood desks are susceptible to water rings from coffee mugs or plant pots. Always use cork or leather coasters, and wipe up spills immediately.
Periodic Sealing: If you used a natural oil finish (like Danish oil or beeswax), reapply a thin coat every 6 to 12 months to keep the grain rich and protected against scratches.
B. Textile Maintenance in the Reading Nook
Fabric Rotation: Rotate your throw pillows and cushions seasonally to distribute wear and tear evenly, especially if the nook sits near a sunlit window (which can cause fading).
Vacuuming and Spot Cleaning: Use a soft upholstery attachment on your vacuum bi-weekly to prevent dust buildup in the deep folds of boucle or velvet fabrics.
C. Structural Checkups
Because floating desks rely entirely on wall anchorage, it is wise to check the heavy-duty mounting screws and brackets once a year—especially if you occasionally lean heavily on the desk while standing up. Tightening any minor slack ensures absolute safety and stability.