A cramped desk is rarely just a physical space issue—it is a visual and cognitive tax on your daily workflow. Every misplaced cord, towering stack of paper, or awkward lamp position drains focus and slows momentum.
Maximizing productivity on a small study surface is not about buying more containers or sacrificing comfort. It is about applying intentional space management, ergonomic alignment, and visual reduction to turn a limited surface into a high-efficiency command center.
1. The Ergonomic Blueprint: Anchoring the Core Elements
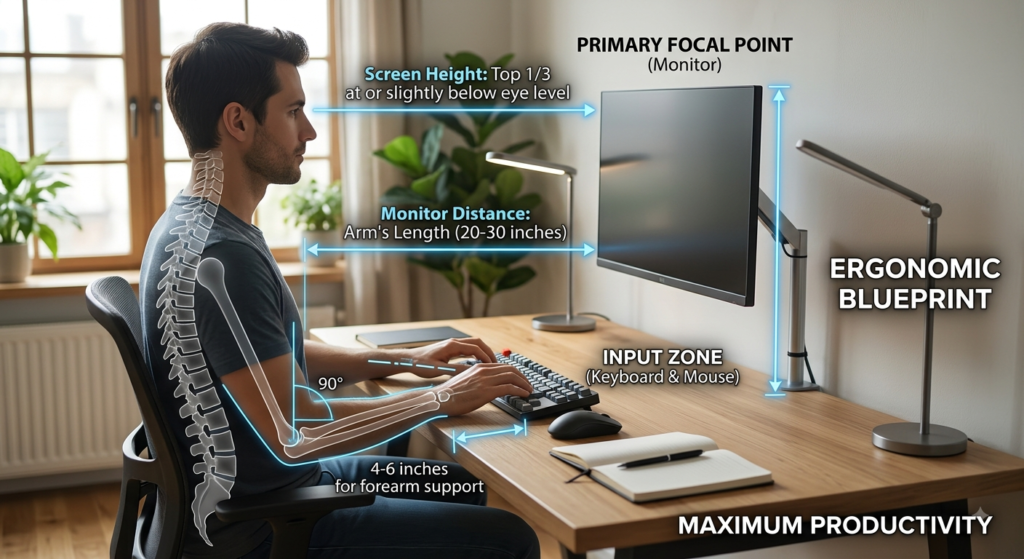
Before adding organizers or personal accents, your primary work tools—monitor, laptop, keyboard, and mouse—must be placed according to ergonomic guidelines. If your primary tools cause neck strain or wrist fatigue, no amount of layout optimization will save your workflow.
Primary Focal Point (Monitor or Laptop)
- Height: The top third of your screen should sit at or slightly below eye level. Use an adjustable monitor arm rather than a bulky monitor riser.
- Distance: Position the screen roughly an arm’s length away ($20\text{ to }30\text{ inches}$). On a small desk ($18\text{ to }24\text{ inches}$ deep), a wall-mounted display or a clamp-style monitor arm frees up critical footprint space underneath.
Input Zone (Keyboard and Mouse)
- Elbow Angle: Keep elbows bent at roughly 90 degrees, resting flush with or slightly above table height.
- Wrist Placement: Maintain a neutral wrist alignment. If using a small desk without a keyboard tray, keep the keyboard 4 to 6 inches away from the front edge to provide adequate forearm support.
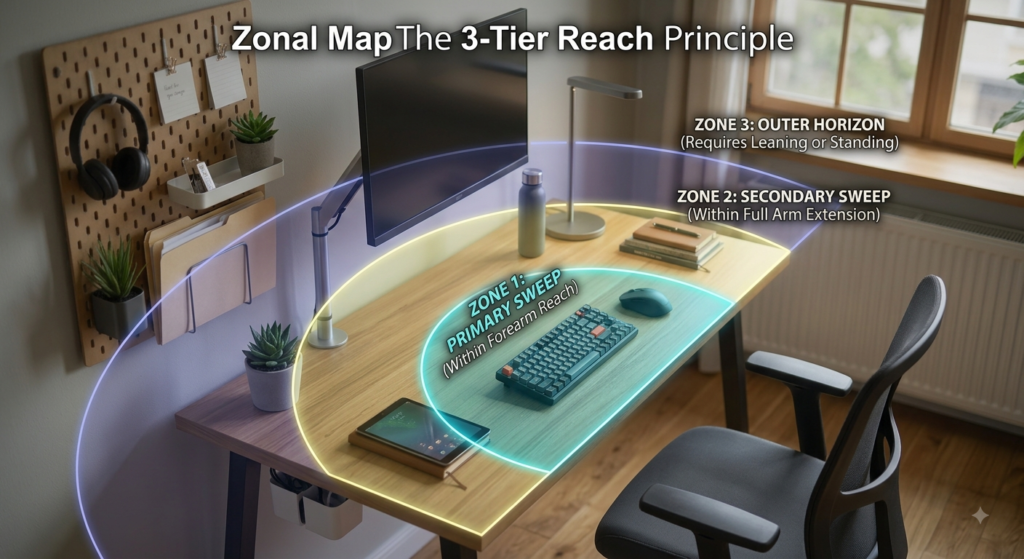
2. Zonal Mapping: The 3-Tier Reach Principle
To prevent constant context switching and reach fatigue, divide your desktop into three clear interaction zones based on frequency of use
- Zone 1: Primary Sweep (Within Forearm Reach)
- Occupies the front center of your desk.
- Reserved strictly for real-time tasks: keyboard, mouse, active notepad, or tablet.
- Rule: Never let non-active items park in this zone.
- Zone 2: Secondary Sweep (Within Full Arm Extension)
- Located along the left, right, and rear edges.
- Houses items accessed periodically throughout the hour: water bottle, reference book, task lamp, or cup of pens.
- Zone 3: Outer Horizon (Requires Leaning or Standing)
- Located above or directly adjacent to the desk.
- Reserved for archiving, secondary monitors, storage bins, and decorative elements.
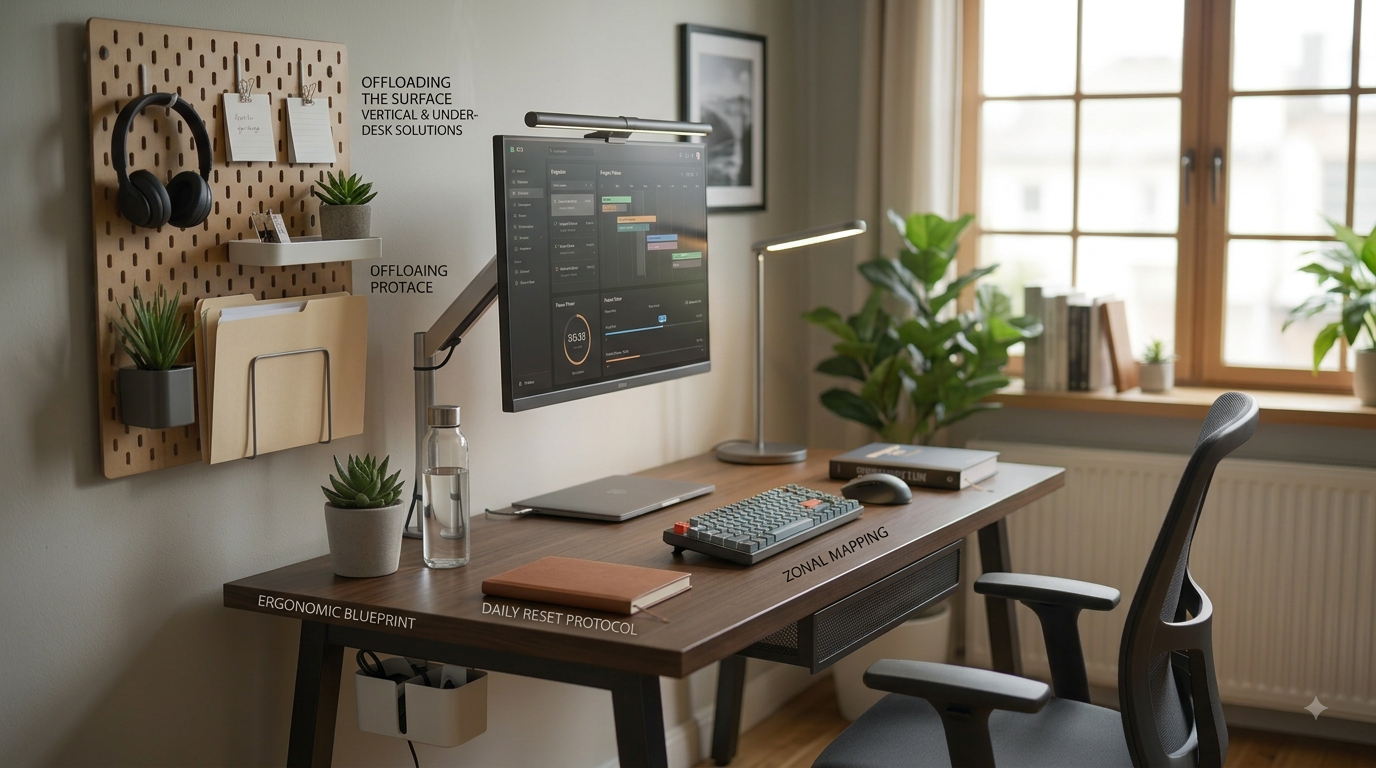
3. Offloading the Surface: Vertical & Under-Desk Solutions
The fastest way to gain real estate on a compact surface ($36\times20\text{ inches}$ or smaller) is to transfer non-essential items off the primary plane entirely.
Vertical Wall Space (Pegboards & Floating Shelves)
Mount a modular metal or wooden pegboard directly behind your monitor. Suspend headphones, cable loops, sticky notes, and small stationery items vertically. This keeps high-frequency items visible without consuming desktop area.

Under-Desk Mounting
Utilize the underside of your desktop. Screw-in or high-strength adhesive under-desk drawers can hold pens, SD cards, drives, and cables completely out of sight.
4. Cable Management & Power Distribution

A web of tangled cables creates micro-distractions and restricts room for paper or peripherals.
- Single-Cable Docking: Connect all peripherals (power, display, data) into a single USB-C or Thunderbolt hub mounted underneath the desk. A single wire should run to your laptop.
- Under-Desk Cable Tray: Mount a wire mesh or felt cable basket beneath the rear edge of the desk. Route surge protectors, power bricks, and excess cords into the basket.
- Cable Clips: Anchor active charging lines to the desk edge using magnetic or silicone cable routing clips.
5. Lighting, Ergonomics & Cognitive Load

Lighting influences circadian rhythm, eye fatigue, and sustained focus.
- Layered Illumination: Combine ambient room light with direct task lighting. Avoid single bright sources in dark rooms, as contrast causes significant eyestrain.
- Monitor Screenbars: Swap traditional desk lamps for a monitor-mounted light bar. Screenbars direct light downward onto the workspace without creating screen glare or taking up desk space.
- Visual Friction: Keep visual clutter out of your direct line of sight. Place storage boxes behind the monitor or off to the side to preserve open visual fields.
6. Daily Reset Protocol

A study desk system only works if it is maintained consistently. Implement a 2-minute reset at the end of every work session:
- Clear Zone 1: Return pens, notes, and cups to their designated spots.
- Align Peripherals: Push the keyboard and mouse back beneath or near the monitor arm.
- Queue the Next Task: Place tomorrow’s primary reference material or active task front and center so you can begin without setup friction.