The modern workspace has migrated far beyond mere utility. Whether you are a software engineer spending twelve hours at a custom-built standing desk, a creative director color-grading video footage, or an avid PC enthusiast crafting a clean, immersive setup, the physical environment directly impacts focus, mood, and visual fatigue.
Among the myriad of desk setup upgrades—mechanical keyboards, monitor arms, acoustic paneling—lighting remains the single most transformative element. However, the era of exposed, cheap LED strips casting harsh glare, hot spots, and dotted reflections on hardwood floors or PC side panels is officially over.
Enter diffused Chip-on-Board (COB) LED strip lighting. By eliminating individual diode hotspots and replacing them with a continuous, liquid-like ribbon of light, COB technology has redefined under-desk aesthetic lighting. This guide explores the engineering, design principles, installation strategies, and smart ecosystem integrations needed to turn an ordinary desk into an ergonomic visual masterwork.
1. The Death of SMD: Why COB Technology Wins
To understand why diffused COB strips have taken over high-end desk setups, it helps to examine the flaws of legacy LED technology.
Traditional Surface Mounted Device (SMD) LEDs
Standard LED strips traditionally use SMD 5050, 2835, or 3528 chips. These consist of individual LED packages soldered at wide intervals along a flexible circuit board (typically 30 to 60 diodes per meter).
When installed under a desk:
- The “Spotlight” Effect: Diodes project individual cones of light onto floors, footrests, or legs, creating distracting visual noise.
- Reflective Harshness: On hardwood, tile, or polished floorboards, exposed SMD LEDs reflect as harsh, jagged pinpricks of light.
- Diffuse Inefficiency: Even when placed inside aluminum channels with frosted covers, low-density SMD strips still bleed visible “beads” unless the channel depth is unusually deep—a profile too thick for clean under-desk mounting.
Chip-on-Board (COB) Architecture
COB technology fundamentally alters how LEDs are manufactured and packaged. Instead of housing individual diodes in plastic casings, hundreds of microscopic LED chips are bonded directly to a flexible printed circuit board (FPCB) and covered by a continuous layer of phosphor silicone.
Key Advantages of Under-Desk COB Strips:
- Ultra-High Density: Packing 320, 480, or even 512+ micro-diodes per meter yields an uninterrupted line of luminescent energy.
- Zero Hotspots at Short Proximity: Because the light source is unified under a single phosphor coating, COB light diffuses perfectly even when mounted millimeters away from a surface.
- Wider Beam Angle: Standard SMD LEDs feature a beam angle between 100° and 120°. COB strips routinely cast light across a 140° to 180° field, spreading soft ambient illumination under the desk without harsh shadows.
- Enhanced Flexibility: The continuous matrix distributes thermal and mechanical stress evenly, allowing COB strips to bend around tight desk corners without risking solder-joint fracture.
2. Ergonomics and Psychology of Under-Desk Ambient Lighting
While under-desk lighting is often categorized as a purely visual upgrade, its primary functional value lies in visual ergonomics and spatial psychology.
Bias Lighting and Contrast Reduction
When staring at bright monitors in a dimly lit room, your eyes constantly adjust between the display’s bright center and the dark void around and beneath your desk. This constant pupillary dilation causes eye strain, dryness, fatigue, and tension headaches.
Indirect under-desk illumination provides secondary bias lighting. By gently washing the ground plane and rear wall under the desk with light, you raise the room’s ambient baseline luminosity. This softens high-contrast thresholds, creating a relaxing visual transition from screen to room environment.
Circadian Lighting Alignment
Light influences the brain’s melatonin output through non-visual intrinsically photosensitive retinal ganglion cells (ipRGCs). Using tunable white or color-shifting COB strips allows you to align your desk environment with natural circadian rhythms:

3. Selecting the Right COB Strip for Your Aesthetic
Choosing the ideal COB strip requires navigating technical specifications like color temperature, voltage, color rendering index (CRI), and power requirements.
Color Spectrum Types: CCT vs. RGBW vs. RGBCCT
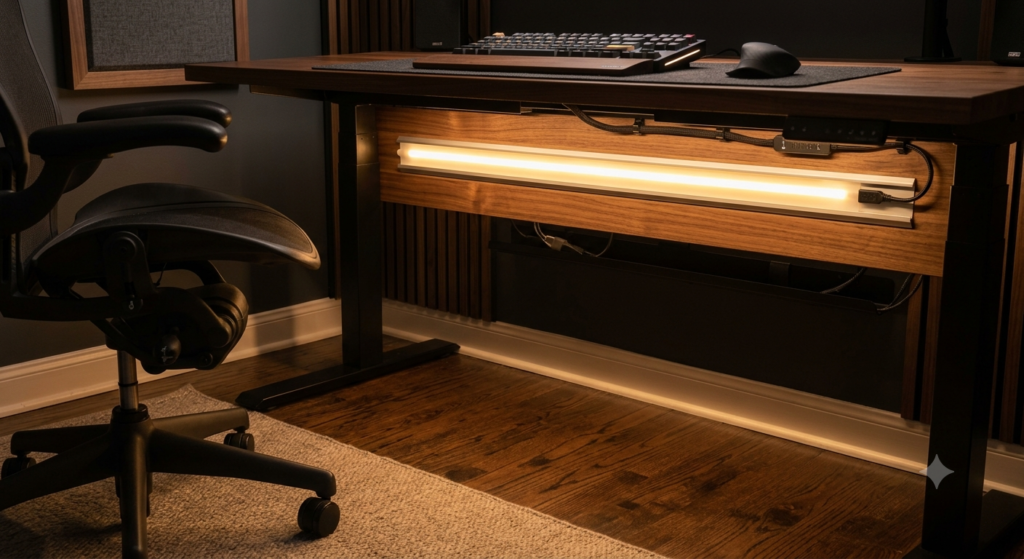
- Single-Color (Static Warm/Neutral White): Clean and minimalist. A static 3000K warm white or 4000K neutral white strip delivers an architectural look suited for wood tone desks (oak, walnut) and industrial steel frames.
- Tunable White (CCT): Combines alternating warm white and cool white micro-diodes under the phosphor strip, allowing dynamic temperature adjustment from 2700K to 6500K. Perfect for setups that transition from day productivity to night tasks.
- RGB (Full Spectrum Color): Provides vivid saturated hues (reds, blues, purples). However, standard RGB strips produce a messy, low-quality “synthetic” white by mixing red, green, and blue light.
- RGBCCT / RGBWW (The Gold Standard): Features dedicated RGB micro-diodes alongside warm white and cool white emitters on the same board. This allows for rich dynamic colors during leisure hours and accurate high-CRI white light during work sessions.
Voltage Choice: 12V vs. 24V
Always opt for 24V COB LED strips for under-desk installations, especially on wide or standing desks.
12V strips suffer from voltage drop over longer runs (exceeding 2 to 3 meters), causing the far end of the strip to dim or shift in color tone. 24V systems draw half the amperage for the same power wattage, ensuring consistent brightness and lower operating heat across the full length of the desk frame.
Color Rendering Index (CRI)
For white-spectrum COB strips, select a rating of CRI > 90 (ideally CRI 95+). High CRI ensures that natural wood finishes, cable management wraps, and carpet textures appear rich, true-to-life, and vibrant rather than washed-out or greenish.

4. Hardware and Channel Selection for the Cleanest Look
Even though COB strips are naturally diffused, mounting a bare strip directly to raw wood or powder-coated steel yields an unfinished look and risks premature adhesive failure.
Aluminum Extrusions & Profile Types
Aluminum channels act as both a thermal heat sink (extending the LED chip life span) and a mechanical shield against accidentally kicking or snagging the strip with your feet.
- Surface-Mounted Flat Channels (Low-Profile):
- Height: 6mm–10mm.
- Best for: Mounting directly under the front lip or midsection of flat wooden desktop slabs.
- 45-Degree Corner Profiles:
- Best for: Mounting against the back crossbar or leg bevels, casting light down and backward toward the wall simultaneously at a 45-degree trajectory.
- Recessed Channels:
- Best for: Custom woodworking setups. Requires routing a shallow channel into the underside of the desktop so the aluminum channel sits flush with the wood surface.
Frosted Covers vs. Silicone Sleeves
While COB phosphor layers soften light output, adding a deep frosted PC (polycarbonate) diffuser cover on top of your aluminum extrusion scatters the illumination even further, creating a soft gradient beam on the floor.
For maximum liquid-like light distribution, choose a silicone-encapsulated neon-flex COB tube, which encases the COB strip inside an IP67-rated opal silicone sleeve that can be mounted using low-profile clips.
5. Masterclass: Installation Step-by-Step
A professional under-desk installation should conceal all wiring, power transformers, and controllers while ensuring long-term thermal stability and durability.
Material Checklist
- 24V RGBCCT or Tunable White COB LED Strip
- Matched 24V Power Supply Unit (PSU) with 20% power headroom
- Aluminum LED Profiles with Frosted PC Lenses
- Smart LED Controller (Zigbee, Matter, or Wi-Fi)
- Heat-shrink tubing and 5-wire / 6-wire extension cable
- VHB (Very High Bond) Acrylic Foam Tape
- Cable clips, raceways, and woven sleeving
Step 1: Mapping Placement for Optimal Light Projection
The placement of the strip dictates the ambient effect:
- Rear Edge Wash (A): Mount the channel along the rear underside lip, angling the diffuser slightly toward the back wall. This casts light up the wall behind the desk and down toward the floor, creating a floating desk illusion.
- Full Perimeter Under-Glow (C): Mount the profile 1 to 2 inches inside the outer edge along all four sides. This produces a vehicle-style under-glow effect.
- Dual-Zone Hybrid Setup: Combine an angled 45° strip on the rear desk edge with a flat diffused strip running underneath the desk frame for independent ambient control.
Step 2: Cutting and Thermal Preparation
- Measure your desktop dimensions, leaving 2 to 3 inches of clearance near cable grommets or leg attachments.
- Cut the aluminum channels using a fine-tooth metal handsaw or miter box. Deburr the raw edges to avoid scraping the strip wiring.
- Locate the designated copper pad cut points on your COB strip (typically every 25mm to 50mm). Never cut outside marked cut lines, as this breaks the internal series circuit for that segment.
Step 3: Wiring, Soldering, and Power Sizing
For maximum long-term reliability, avoid clip-on solderless connectors. They add bulk inside narrow aluminum channels, degrade under tension, and exhibit high contact resistance over time. Soldering wires directly to the copper pads produces the cleanest finish.
Calculating Power Supply Needs:
Always run your lighting setup with a safety buffer so the transformer does not overheat:
$$\text{Required PSU Wattage} = (\text{Strip Wattage per Meter} \times \text{Length in Meters}) \times 1.20$$
Example: A 3-meter COB strip drawing 14W/m requires $3 \times 14 = 42\text{W}$. Adding a 20% headroom factor ($42 \times 1.20 = 50.4\text{W}$) means choosing a 60W 24V power supply
.Step 4: Mounting and Wire Management
- Clean the underside of the desk slab or steel frame with 70% isopropyl alcohol to clear dust and oil residues.
- Do not rely solely on factory adhesive backing. Apply 3M VHB acrylic foam tape along the back of the aluminum channel.
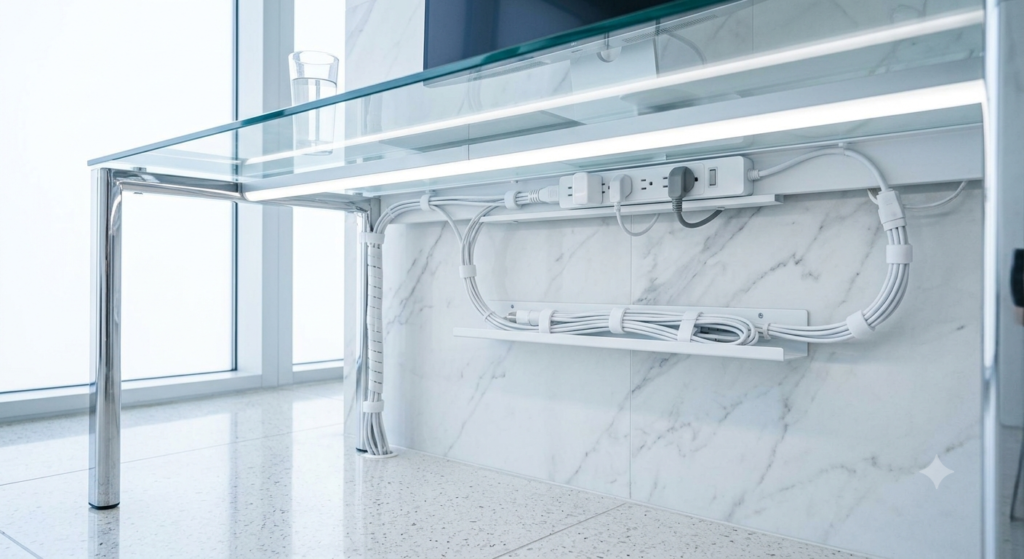
- Route the power lead directly into an Under-Desk Cable Management Tray or J-Channel.
- Mount the LED controller and power supply to the underside of the desk using heavy-duty dual-lock fasteners or mounting brackets. Ensure the power supply has adequate air clearance for thermal convection.
6. Curating Specific Aesthetic Themes
Diffused COB lighting acts as the visual backbone of a desk setup. Here is how to configure light color, brightness, and surface materials to match popular aesthetic themes.
Aesthetic 1: Minimalist Japandi / Warm Organic Wood
- Desk Material: Solid Walnut, White Oak, or Birch butcher block.
- Lighting Configuration: High CRI (95+) Tunable White COB set between 2700K and 3200K.
- Intensity: 20% to 40% dimming for a soft, warm ember glow.
- Goal: Emphasize rich wood grain textures and organic warm tones while keeping the room feeling peaceful and calm.
Aesthetic 2: Dark Academia / Industrial Stealth
- Desk Material: Matte black linoleum, dark stained oak, or powder-coated black steel frame.
- Lighting Configuration: Deep Amber / Warm Gold (2200K) or subdued Emerald/Forest Green tones.
- Intensity: 15% to 30% low output.
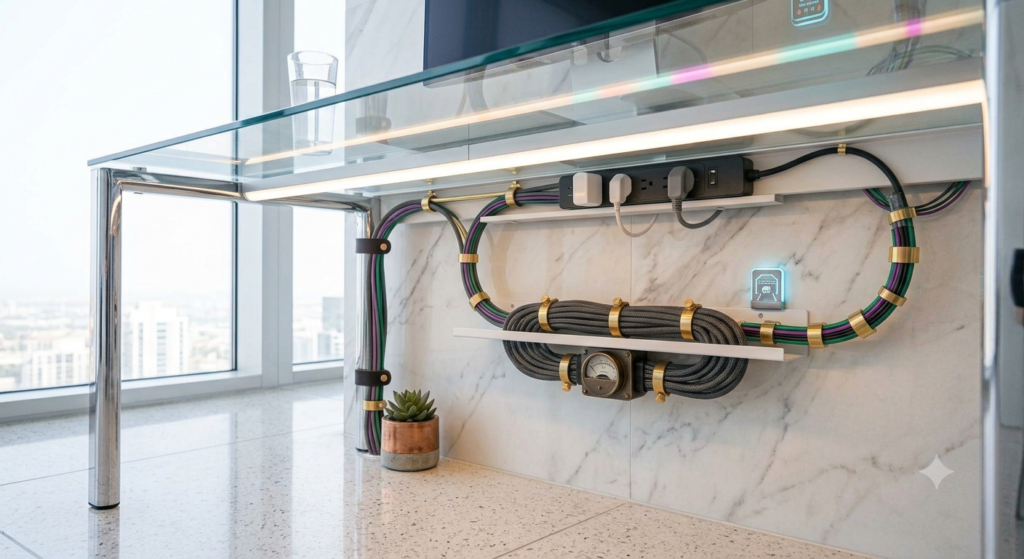
- Goal: Cast deep shadows while highlighting polished metallic accents, leather desk pads, and brass desk accessories.
Aesthetic 3: High-Tech Cyberpunk / Neon Synthwave
- Desk Material: Dark tempered glass, carbon fiber textures, or white laminate desktop.
- Lighting Configuration: RGBCCT COB set to contrasting split-spectrum tones—such as Deep Cyan (#00F5D4) mixed with Vivid Magenta (#FF007F).
- Intensity: 60% to 80% output.
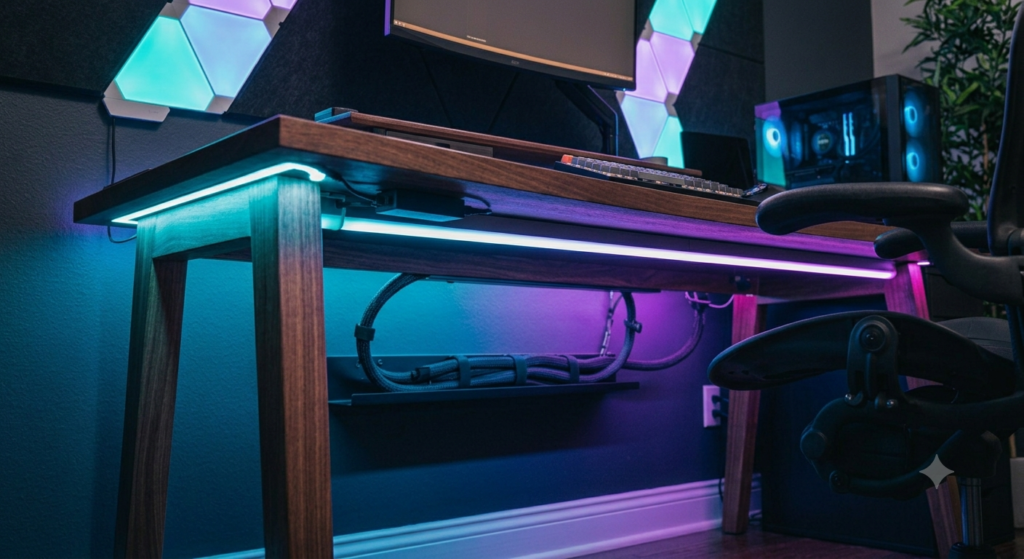
- Goal: Create crisp color gradients across the floor plane, reflecting clean neon accents off modern PC case glass panels.
Aesthetic 4: Clean Productivity Studio (Apple Ecosystem Style)
- Desk Material: Smooth matte white, silver anodized aluminum legs, light maple desk surface.
- Lighting Configuration: Pure Neutral White (4000K–4500K).
- Intensity: 70% to 100% during focus hours.
- Goal: Replicate balanced daylight conditions, minimizing shadow artifacts around work peripherals.
7. Smart Home Integration and Dynamic Automation
Static lighting is useful, but automated lighting elevates a setup into an intuitive workspace.
1. Adaptive Circadian Lighting
Using platforms like Home Assistant or Apple HomeKit, configure your CCT COB strip to adjust color temperature automatically throughout the day:
- 08:00 AM: Ramp up to 5000K at 80% brightness.
- 01:00 PM: Shift to 4000K neutral white.
- 06:00 PM: Transition to 2700K warm white over a 30-minute cross-fade.
- 10:00 PM: Drop to 2200K amber glow at 15% brightness for late-night productivity.
2. Radar/mmWave Motion-Based Welcome
Pair an mmWave presence sensor under your desk edge. When you step into your workspace area:
- The under-desk COB strip smoothly fades up from 0% to 50% over a 3-second transition, creating an inviting, high-end ambiance without needing to search for a light switch.
- If no presence is detected for 10 minutes, the lights gently fade off to conserve energy.
3. Screen Color Sync (Immersive Entertainment)
By pairing an RGB COB strip driven by an ESP32 microcontroller running WLED software, you can sync your under-desk lighting to your display using software like SignalRGB or Prismatik. When watching movies or gaming, bright explosions or atmospheric scenes spill beneath your desk in real time.
8. Common Pitfalls and Troubleshooting
Avoid these mistakes to ensure a seamless installation:
Problem 1: Flickering or Buzzing Sound
- Cause: Low-quality PWM (Pulse Width Modulation) dimmers or an overloaded power supply transformer.
- Solution: Replace cheap inline dimmers with high-frequency PWM controllers (over 4kHz) or switch-mode power supplies. Choose high-efficiency fanless power supplies with solid aluminum casing.
Problem 2: Light Strip Thermal Degradation
- Cause: Operating high-wattage COB strips directly stuck to wood without an aluminum channel.
- Solution: Wood is a poor thermal conductor. Without metal heat sinking, the continuous phosphor layer traps heat, leading to premature diode discoloration, shifts toward an ugly blue/green tint, and premature adhesive failure. Always use aluminum channels.
Problem 3: Visible Cable Clutter Drop-Down
- Cause: Heavy wires pulling away from the desk surface over time.
- Solution: Use screw-in cable tie mounts or heavy-duty raceways directly behind the aluminum extrusion. Anchor wire runs every 6 inches to prevent sagging.
Frequently Asked Questions
Can COB LED strips be bent around 90-degree desk corners?
While COB strips are more flexible than traditional SMD strips, you should never bend them at a sharp 90-degree angle along their flat axis. Doing so risks cracking the continuous silicone phosphor layer. Instead, use a small “fold-back loop” at corners, or cut the strip cleanly at marked solder pads and bridge the corner with 90-degree corner connectors or flexible jumper wires.
Do diffused COB strips get dangerously hot under a wooden desk?
When properly installed inside an aluminum extrusion, COB LED strips operate warm to the touch (around 35°C–45°C), which is completely safe for wooden, composite, or metal desks. The aluminum track absorbs excess thermal energy and dissipates it into the air.
Is a diffuser cover necessary if COB strips already lack visible hotspots?
While bare COB strips eliminate individual diode hotspots, their yellow silicone phosphor line remains visible when turned off. Placing the strip inside an aluminum channel with a frosted lens protects the strip from dust, spills, and accidental kicks, while smoothing out the light projection across your floor.
Summary Checklist for the Ideal Setup
To achieve an elegant, clean under-desk aesthetic:
- Select 24V RGBCCT or Tunable White COB Strips with a minimum density of 480 LEDs/meter and CRI > 90.
- Mount the strip inside an aluminum channel with a frosted lens to protect the electronics and heat-sink the LEDs.
- Choose a 24V power supply rated for at least 20% higher wattage than the strip’s total power consumption.
- Solder wires directly to cut points rather than using flimsy clip-on plastic connectors.
- Pair with a Zigbee or Matter smart controller to enable automated circadian schedule adjustments.
- Conceal all power bricks and cables inside an under-desk wire management tray for a seamless finish.
By combining low-profile COB hardware with smart automations, you turn under-desk illumination into an essential element of modern workspace design.